
eLabFTW, The Best Free Electronic Lab Notebook Setup - Installation
This post is translated by Gemini 2.5 Pro based on THIS post.

What is eLabFTW?
eLabFTW is a free, open-source Electronic Lab Notebook (ELN). You can think of it as a web-based platform maintained and developed by a French company called Deltablot, designed to systematically manage experimental data, protocols, and results in a lab setting.
Key Features
- Free and Open Source: Honestly, I think the commercial or government-provided electronic lab notebooks are all pretty bad. You can use this for much cheaper than commercial software, and best of all, since it’s open source, you can even implement the features you want yourself.
- Web-Based: Because it’s accessible via a browser, you can connect from various devices regardless of the operating system. If you’ve jotted down a protocol, you can simply view it on your phone during an experiment.
- Database and Wiki-Link Integration: You can manage experimental data systematically. If you’ve used Wikipedia often, you’ve probably seen
wikilinks. You can link content from other lab notes within your notes, allowing for an implementation similar toObsidianorNotion. - Collaboration Features: Real-time sharing with lab team members is possible. You can also view schedules, book equipment, and handle other matters all within this platform.
- Backup and Security: This is truly its strongest feature. Your data is stored directly on your local computer. Backing up and managing your data is your choice. However, you might be suspicious about whether it can be tampered with as an electronic lab notebook. To overcome this, there’s a signature system and a timestamping system through a third-party institution! Don’t worry!
In conclusion, eLabFTW is an excellent electronic lab notebook platform. Let’s get to the installation.
For the official installation method, please refer to this link: Official Installation Guide

Don’t panic. This system is fundamentally server software, so it requires a Linux-based OS, but that doesn’t mean it can’t be installed on Windows. From now on, I’ll share a “hacky” way to install it on Windows, so just follow along.
What you’ll need:
- Operating System: Windows 11 (with WSL2)
- Your Effort: A handful
Installation Process
1. Set up WSL2 and Install Ubuntu
Windows has a powerful Linux virtual environment called WSL2. We’re going to use it, so first, let’s enable WSL2.
- In the
taskbarsearch bar, typeTurn Windows features on or offand run it. You’ll see something like the image below. Check the box forWindows Subsystem for Linuxand clickOK.

- If a message prompts you to restart the system,
Restart the system. - Press
Win+Rto openRun, typecmd, and launch theCommand Prompt.

- If you type
wslas shown above, it will probably install the defaultUbuntu. If it doesn’t work well, just Google it.
2. Install Docker in WSL2
This part is a bit tricky. Docker has a feature called Docker Compose, which is divided into V1 and V2. You don’t really need to know the details, but V1 is no longer used, so we need to install V2. Let’s figure that out.
- First, let’s access the
WSLenvironment we installed. You can typewslin theCommand Prompt (CMD)or search forwslin thesearch barand run it.
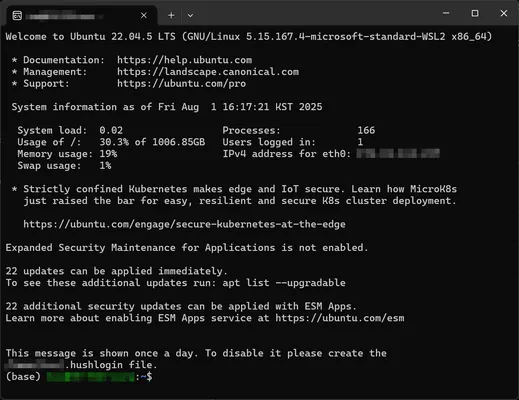
You’ll see a screen like this. Don’t be alarmed if the last line looks a bit different. Mine looks that way because I have Conda installed. Just ignore it and proceed. Now, carefully copy and paste the following code blocks sequentially.
sudo apt-get update
sudo apt-get install -y ca-certificates curl gnupg

# You can copy and paste this whole block at once.
sudo install -m 0755 -d /etc/apt/keyrings
curl -fsSL https://download.docker.com/linux/ubuntu/gpg \
| sudo gpg --dearmor -o /etc/apt/keyrings/docker.gpg
sudo chmod a+r /etc/apt/keyrings/docker.gpg

# Copy and paste this block up to the enter key as well.
echo \
  "deb [arch=$(dpkg --print-architecture) signed-by=/etc/apt/keyrings/docker.gpg] \
  https://download.docker.com/linux/ubuntu \
  $(. /etc/os-release && echo ${UBUNTU_CODENAME:-$VERSION_CODENAME}) stable" \
| sudo tee /etc/apt/sources.list.d/docker.list > /dev/null

sudo apt-get update
This completes the registration of the APT repository for the Docker installation. It looks complicated, but it’s not!
Now, let’s install Docker, Docker Compose V2, and other components together. Copy and paste all the code below.
sudo apt-get install -y docker-ce docker-ce-cli containerd.io \
                        docker-buildx-plugin docker-compose-plugin
Woohoo! Now all the necessary Docker components are installed.
docker compose version # Example output: Docker Compose version v2.39.1
docker --version # Example output: Docker version 28.3.3, build 980b856
Enter the two commands above into wsl to check if they output correctly, then proceed to the next step. It’s okay if the output versions are different. You’ve probably installed a newer version than mine.
3. Install eLabFTW
Now, we’ll install eLabFTW for real!
First, we’re going to use a program called elabctl, so before we use it, we need to install dialog. Enter the command below.
sudo apt-get install dialogAnd now, let’s install elabctl. It’s just a bunch of scripts that help with the elabftw installation, and it’s convenient, so let’s use it.
# Download the elabctl file and set its permissions with the code below.
curl -sL https://get.elabftw.net -o elabctl && chmod +x elabctl
# The code below moves it to `bin` so you can use it in the `terminal`.
sudo mv elabctl /usr/local/bin/sudo elabctl installIf you’ve gotten this far, an installation window made with dialog will appear. I don’t remember the details exactly, but follow this order:
- OK
- I love it!
- On my computer
- Done
It’s probably something like that. I wanted to attach a screenshot of the installation screen, but it told me to delete the existing installation to get there, so I had to rely on my memory. Do you have any idea how annoying a reinstallation is… I’ll update this post with a picture if I get the chance.
Now for the really important configuration step!
You need to focus and follow along carefully.
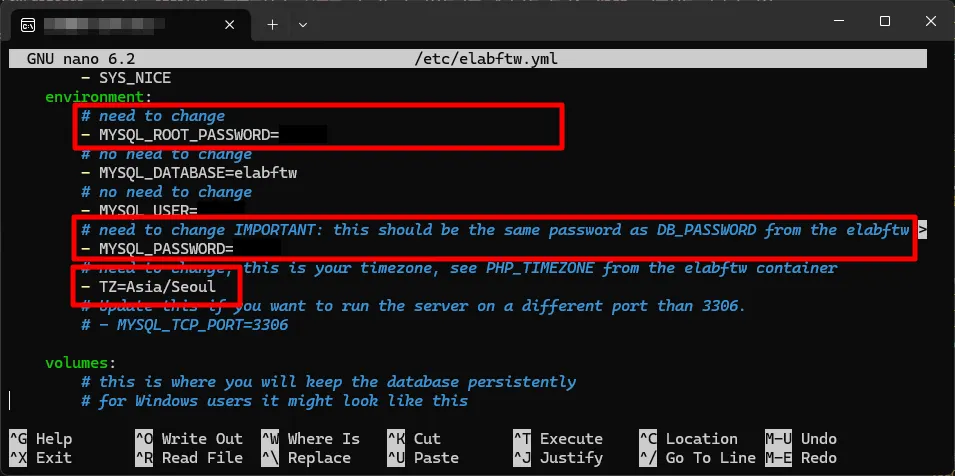
sudo nano /etc/elabftw.ymlEnter the command above to edit the file.


Modify all the parts in the red box. For DB_PASSWORD, you can set it to a password you use frequently for smooth migration later. Change the other TIMEZONE related elements to Asia/Seoul.

Modify this part as well. For SITE_URL, you can write the URL you want to register later, which I might cover in a future post if I get the chance. For now, it’s a useless feature. However, the MAX_UPLOAD_SIZE part below is very important. The maximum size per uploaded file is limited to 100MB by default, but I’ve generously increased it to 512MB. This is because files like LC-MS analysis results can be huge.
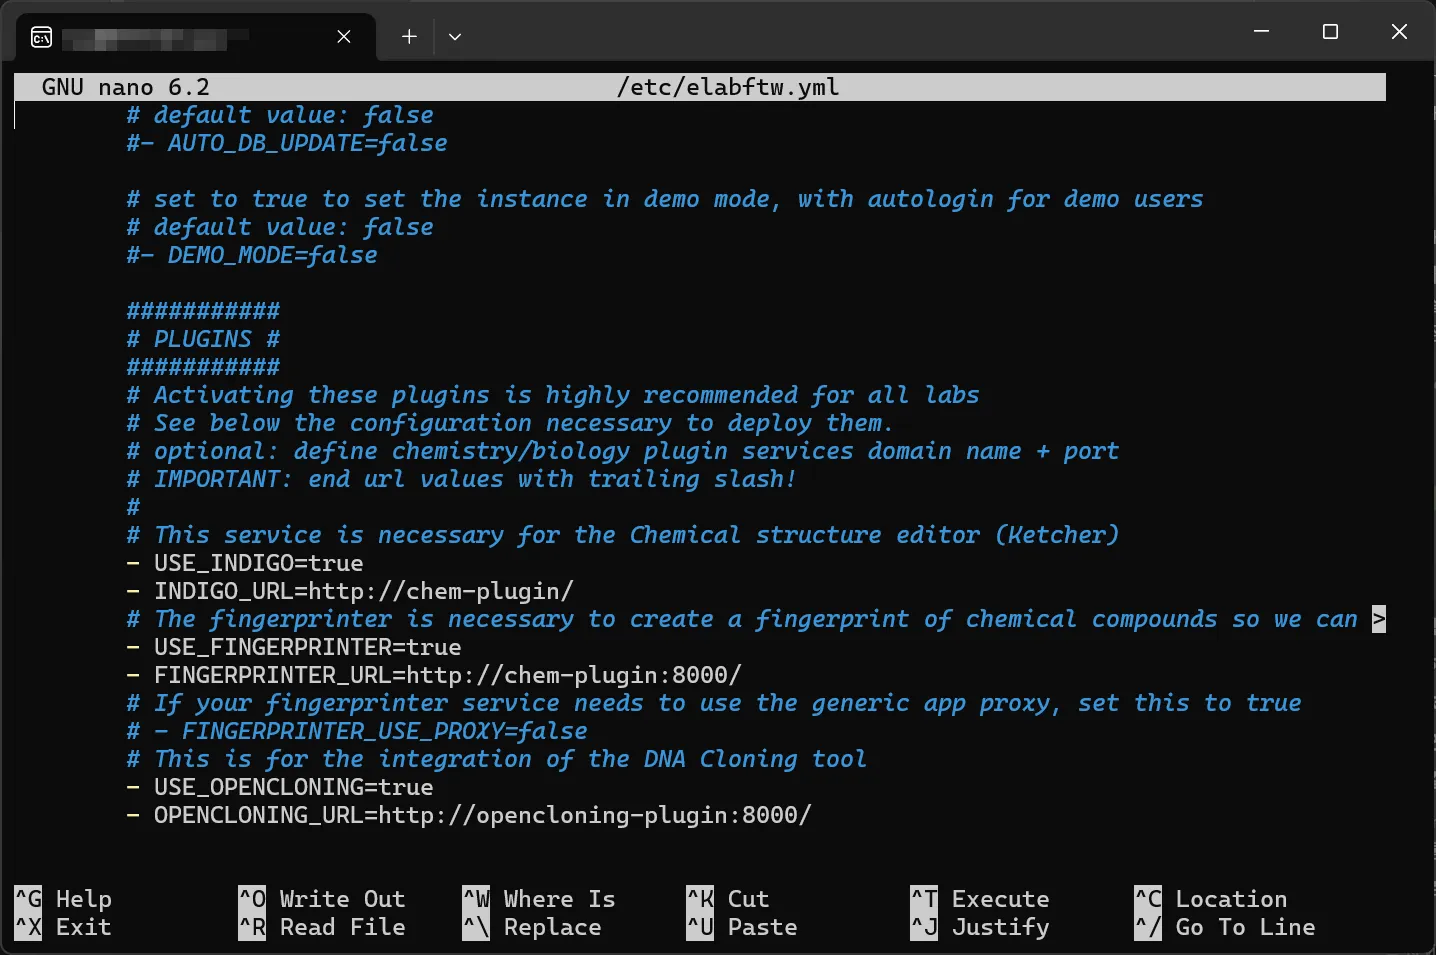
If you scroll down, you’ll find a place to configure PLUGINS, and it’s marked as highly recommended. Let’s enable them all. Make sure that false is changed to true.

I also turned on DEV_MODE and wrote it like that in volumes. However, for normal use, you don’t need to turn on DEV_MODE. The meaning of the additional entry in volumes is a request to link the elabftw/uploads folder in the C drive where Windows is running with the uploads folder of the elabftw program. The WSL2 system creates and uses a virtual hard drive, making it vulnerable to errors. With the setup above, all upload files can be safely stored on the C drive, and a secondary backup can be configured with cloud platforms like Google Drive or OneDrive.
I turned on DEV_MODE expecting that any changes to the source code would be immediately reflected, but it turns out it only disables the Cache function, and you have to minify the source code separately. If you want to modify the source code without this, using the yarn buildadll command will probably solve it. I’ll cover this more in a follow-up post, so you don’t need to worry about it for now.

It seems that MySQL updates are causing I/O errors on the mounting drive. Advanced users might want to mount their MySQL data to another local storage, but if you’re using a WLS2 environment, at least don’t make it go through the Windows I/O.
Once you’ve completed all the settings up to this point, press Ctrl+S and Ctrl+X to save and exit the nano editor.
Let’s try to make something run by typing sudo elabctl start.

But we’re not done yet. Enter the command below.
sudo elabctl initializeWhat to do in case of an error
If an error occurs here, it might be because the elabftw account was not created in the MySQL container. If you type docker ps and see that it’s running normally, it’s time to check the account status.
docker exec -it mysql mysql -u root -p- Enter the
MySQLpassword you set. - Check by entering
SELECT user, host FROM mysql.user;. - Enter the command below, but make sure to replace
your_mysql_passwordwith the password you set.
CREATE USER 'elabftw'@'%' IDENTIFIED BY 'your_mysql_password';
GRANT ALL PRIVILEGES ON *.* TO 'elabftw'@'%' WITH GRANT OPTION;
FLUSH PRIVILEGES;
Installation Complete, Time to Connect
That’s it. Now we need to connect, but the problem is we need to connect to the Ubuntu OS currently open in WSL2. You might not know what that means.
- Enter the command below in
WSL2. ip addr | grep 'inet '

- There will be a part that says
eth0; we’ll be connecting to that IP, so be sure to remember it.
By default, eLabFTW uses port 443. For those who know, this means connecting via HTTPS. For those who don’t… don’t worry about the details, just type https://IP_ADDRESS into your address bar using the IP you just found.

This is a natural phenomenon. This warning appears because you’re connecting via the HTTPS protocol without a certificate. Click on Advanced and then Proceed to [IP address] (unsafe). If this is your first time connecting, you’ll probably go to https://IP_ADDRESS/register.php to set things up.
For now, you can only connect from WSL2. To make it accessible to everyone, you need to set up a rule that forwards connection requests from your computer's IP to the WSL2 IP, and then set up things like DDNS so that you can receive connection requests from outside to your computer's IP. We’ll cover this in a future post.
It might seem anticlimactic, but that’s it. I’m thinking of writing the next parts like this:
- eLabFTW, The Best Free Electronic Lab Notebook Setup - Network Configuration
- eLabFTW, The Best Free Electronic Lab Notebook Setup - Messing with the Source Code
- eLabFTW, The Best Free Electronic Lab Notebook Setup - Updating
References
This article provides a basic framework for installing eLabFTW. For actual installation, please refer to the official documentation.